How To Move Your Blog From Wordpress.com to Your Own Web Host
WordPress.com offers a great way to start up a blog in minutes for free. But there may come a time where you feel you've outgrown the simple setup of WordPress.com and want to be able to move to your own Web Host for more control. This guide is going to show you how you can backup your WordPress.com blog and transfer it to your own web-host to setup your blog there. Let's dive in!
- Select A Webhost For Your Blog
- Backing Up Your Old WordPress.com Site
- Setting Up Your Bluehost Site
- Installing WordPress On Your Own Host
- Importing Your Backup To Your New Site
- Other Issues
WordPress is one of the most powerful blogging platforms on the internet and many people are using it everyday to start a new website. Whether it's for personal-use or setting up your own business website, WordPress is a great tool to use. Many people who are new to setting up their own website start out using the free WordPress.com service, that allows you to get a blog up and running within minutes. You don't have to buy a domain name, upload/download files or install anything. It's very simple and great for beginners.
But there may come a time where you outgrow this free service. You may wish to move your blog to your own hosting platform, buy a domain name and/or customise your WordPress blog with total control. If you're one of the many who find the task of moving your blog to a new web-host daunting, not to worry! This guide will walk you through the simple steps of setting up your own WordPress blog on a self-hosted platform.
Select A Webhost For Your Blog
There are thousands of companies out there offering web-hosting solutions and sometimes it can be hard to choose a reliable one with so many options. If you have a few choices in mind, you'll want to compare the following:
- Support - How quickly do they respond to issues/emails?
- Disk Space / Bandwidth - Will you be given plenty/unlimited space to host your site?
- Domain Name - Do they give you a domain name when you sign up or do you need to register one separately?
- cPanel - Do they offer cPanel for managing your site
- Reliability - Check how long the hosting platform has been around for. You don't want to be building a web site on a platform that might disappear after a year.
- Price - What's the best deal for your needs?
- SSL Certificates - Having HTTPS for your site can help boost your site's rankings in Google and make your site more secure.
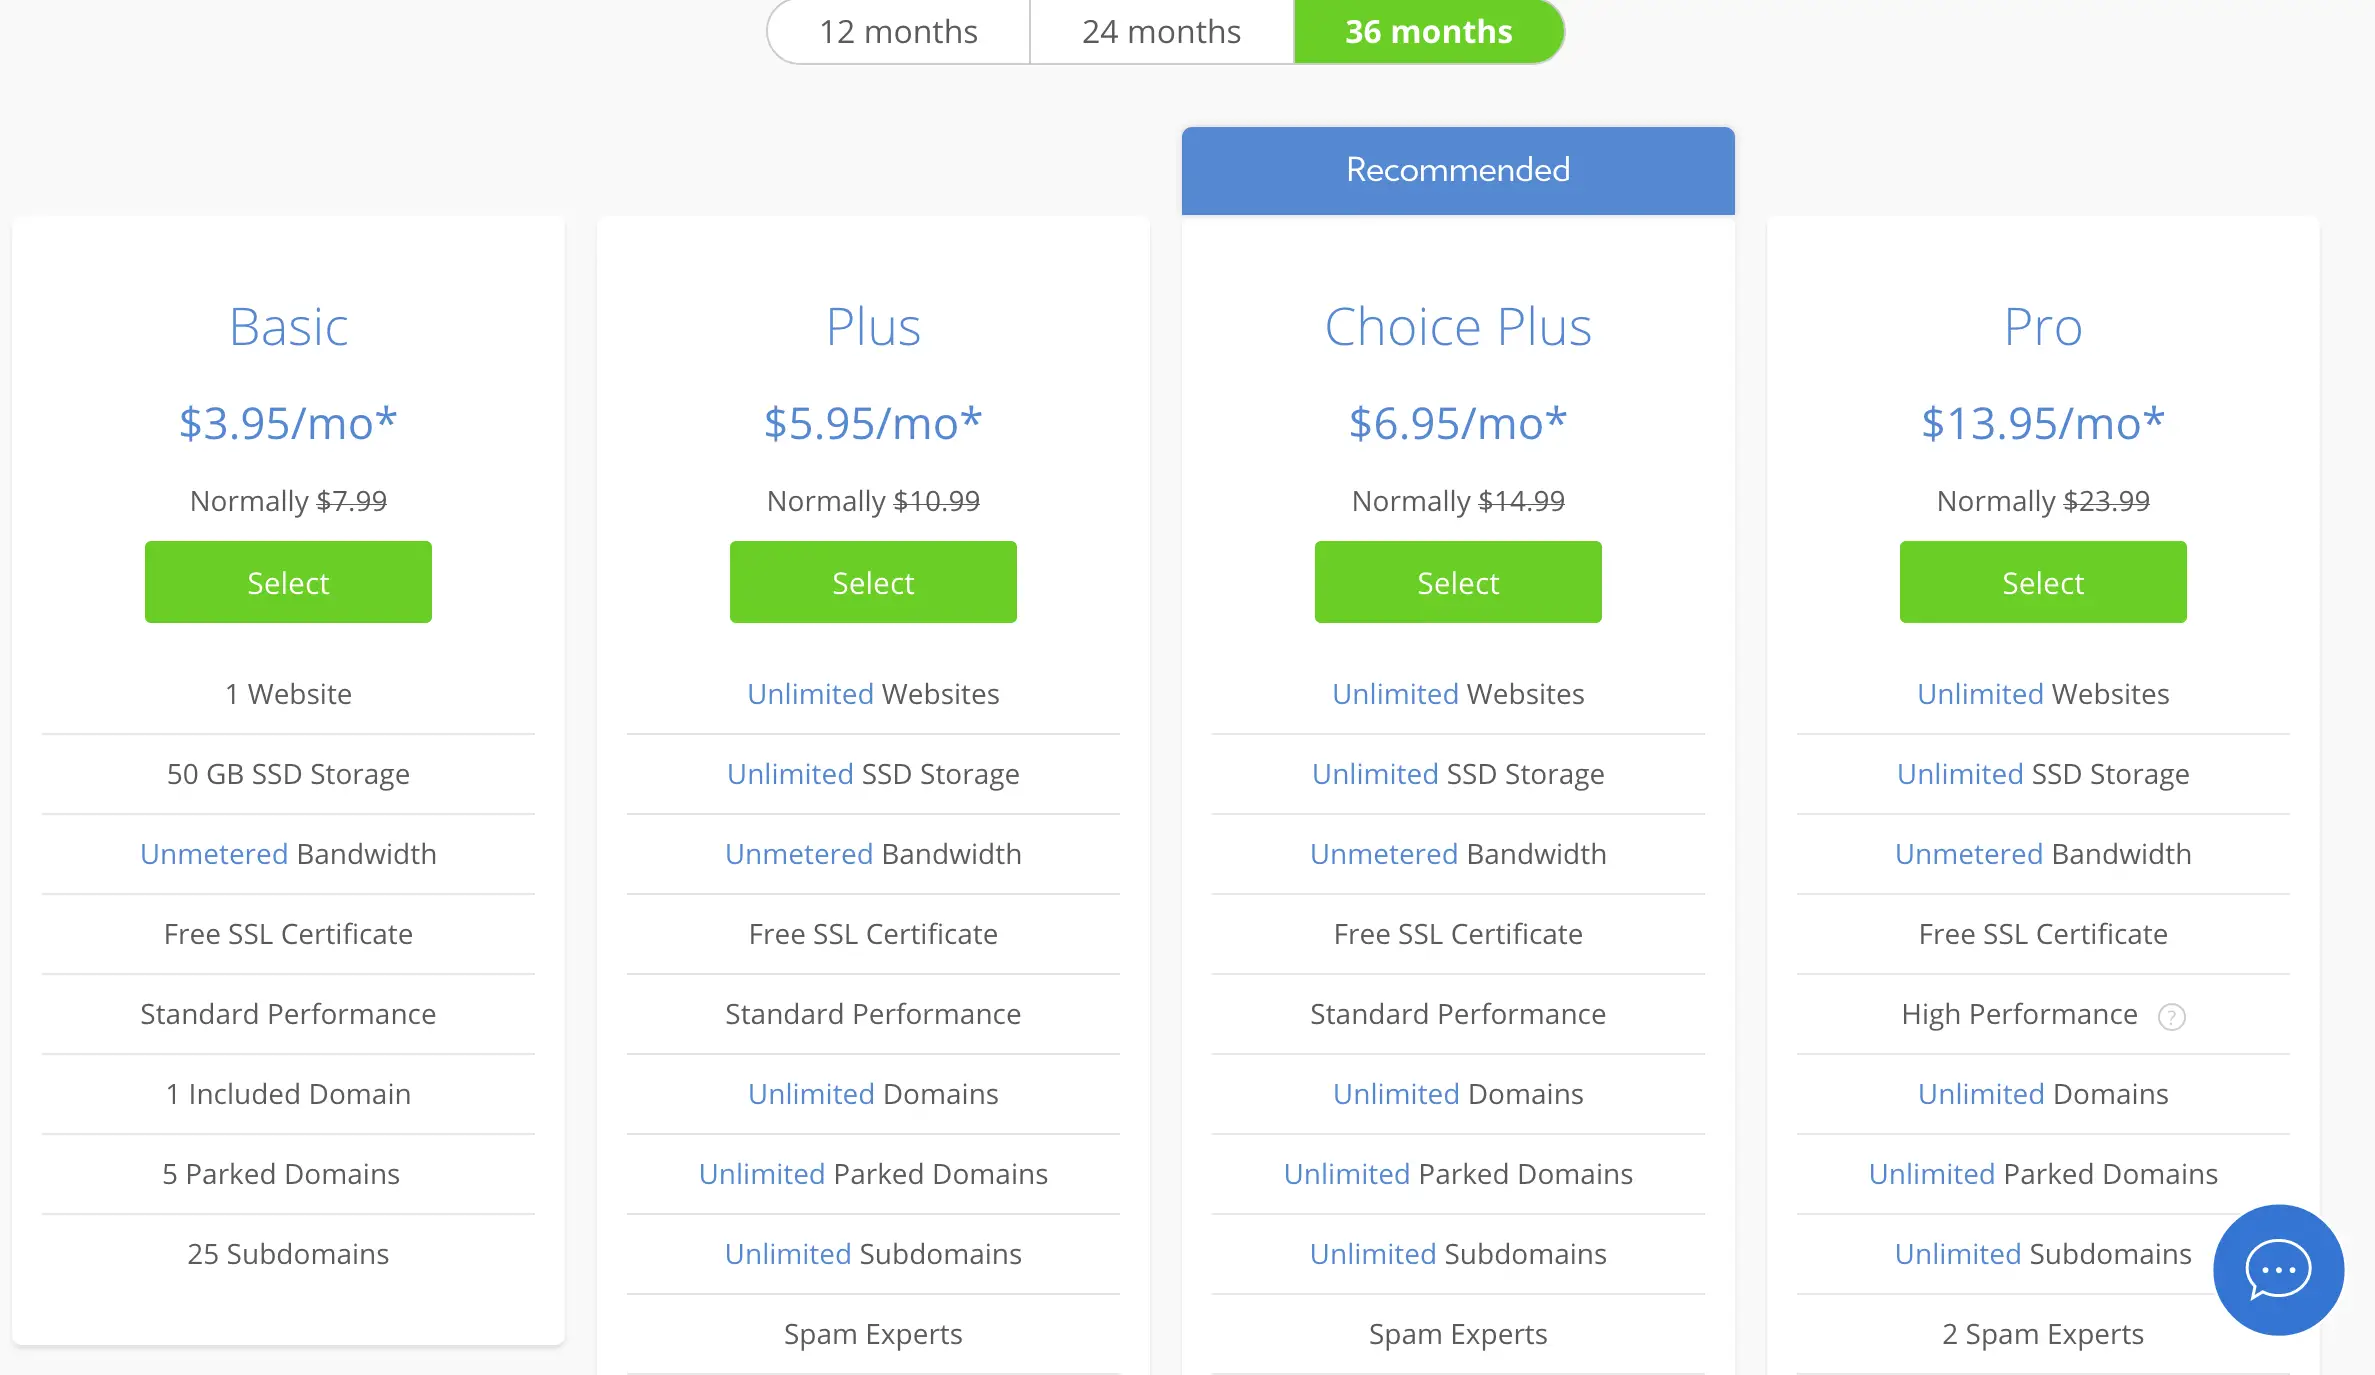
We recommend using Bluehost for your hosting needs. They are a WordPress partner, being one of the recommended hosting platforms for a number of years now. They offer a free domain with each signup and pricing is as low as $3.95/month.
They also offer newbie-friendly platform, with cPanel integration for managing your sites and 24/7 Support should any issues arise. They can also help you with any site-moves you want to make in the future.
Backing Up Your Old WordPress.com Site
In order to transfer everything over to your new self-hosted WordPress blog, you need to take a backup of all your posts, pages, comments, users and media you have added to your blog. Luckily, WordPress.com provide an easy way to export all this data. Just follow these simple steps:
1) Login to your WP Admin Panel
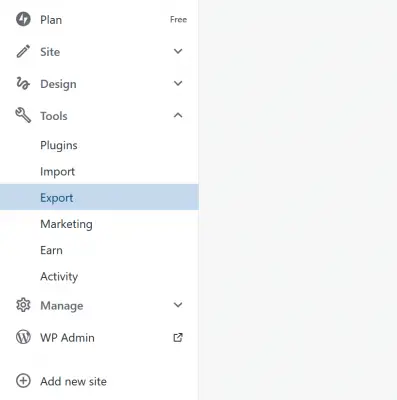
First head to your WordPress Dashboard on WordPress.com. Locate the Tools tab in the left-hand sidebar, expand the menu by clicking on the chevron icon. You should now see a list of extra menu links, including the option to Export. Click on that link.
You'll now see a screen that gives you two options to "Export" your WordPress data.
The first option is Export Content, which contains all your WordPress posts, comments, users and other data stored in your database. You'll want to export all of this if you want your blog to be exactly the same as before. If you only wish to export some of this data, you can choose from a set of options to decide on what content to backup.
Click the Export All button when you're ready. You'll then be sent a download link to the email address of the WordPress.com account. This link is a download link containing all the WordPress data that you'll need for your new WordPress blog.
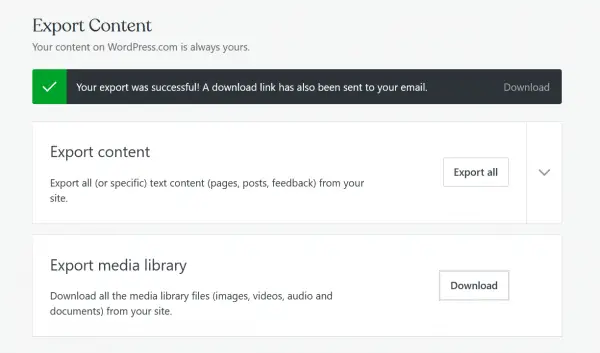
The second export option is Export Media Library. As the name suggests, this includes all the media files you have uploaded to your blog, like images, videos, audio files and anything else. You'll want to export all of this too so that your blog contains all of its images you added to it. Click the Export button will allow you to download everything as a .tar file.
Congratulations, you've successfully backed up your WordPress.com site!
Next, you'll want to put your site into private mode. This means users will no longer be able to access your old blog/site. Once you've done your transfer, you can always delete it later but just in case anything goes wrong, keep it up for a little while.
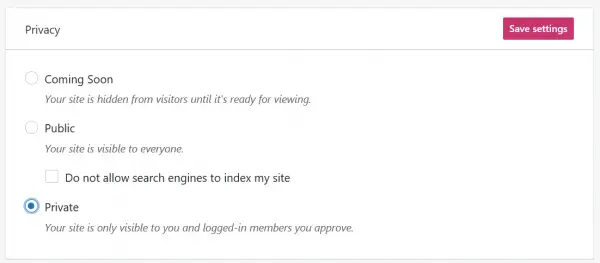
To make it private, go to Manage -> Site Settings and find the Privacy block on that page.
Now you're ready to start setting up your own self-hosted WordPress blog.
Setting Up Your Bluehost Site
If you already have a web-host sorted out, you can skip this part of the tutorial. This part looks at setting up your Bluehost hosting account so that you can install your own copy of WordPress on your server.
The first thing you need to do is choose your hosting package. We recommend any of the shared-hosting packages from Bluehost, some come with more resources than others with slight price increases so choose whichever works best for your blog. Remember, each signup you get a free domain for the first year.
Once you've decided on your hosting package and clicked the Select button, you'll then be asked to decide on what domain name you want next. You can either use one that you already own or register a brand new one. If you're going to use one you already own, you'll need to switch over the DNS settings so that they point at Bluehost (which can take 1-2 days to propagate).
Your domain is what users will type in to remember your blog; if you were using the free option before on WordPress.com, you might have had a subdomain URL like: mycoolblog.wordpress.com. Well now you get to ditch the wordpress.com part altogether! Neat!
Once you've decided on your domain name, you'll then need to enter in your details and payment information. You can either choose 12 months, 24 months or 36 months for your web-hosting plan. The longer you subscribe for, the cheaper it will be overall.
Congratulations on signing up to your new web host!
The next step is to install a new version of WordPress on Bluehost. Bluehost actually offers a quick one-click install for WordPress in some of their plans but for this tutorial we are going to use cPanel and FTP to install WordPress.
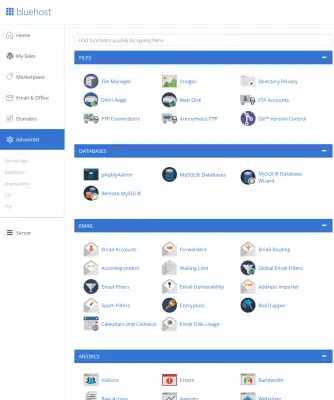
You can find the cPanel by clicking on Advanced in the Bluehost menu. This will show you the familiar cPanel options (if you've ever used it before). In order to install WordPress, you need to create an FTP account to upload the WordPress files and also a database to store all your WordPress information. Follow these steps if you're using Bluehost.
1) Create an FTP Account
In the cPanel area, click on FTP Accounts icon. This will show you a list of all FTP accounts you have and allow you to create a new one. Usually you get a standard FTP account when you sign up, but if you need to create a new one go ahead.
Choose a username, password and set the directory to be the root of your FTP account (leave it blank).
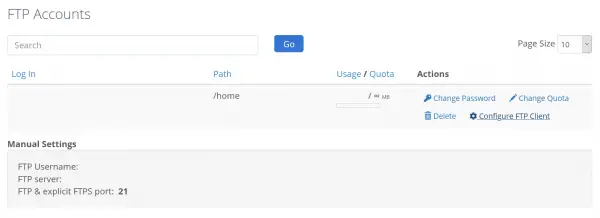
Once created, you can click on the Configure FTP icon to get your FTP connection info. To connect via FTP, you'll need:
- Host
- Username
- Password
- Port
You can use any number of FTP clients available; some of the most popular are FileZilla and WinSCP. Test out your new FTP information and see if you can make a connection to your site.
2) Create a Database
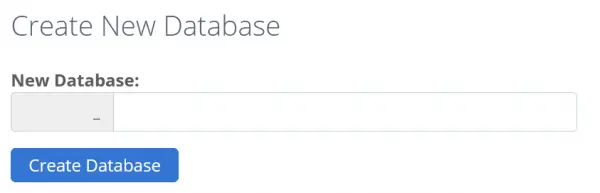
To create a database for your WordPress site, click on the MySQL Databases icon in the Bluehost cPanel. Here you can create your database and user.
Give your database a name and click create.
Next you need to create a Database User and add that user to your newly created database.
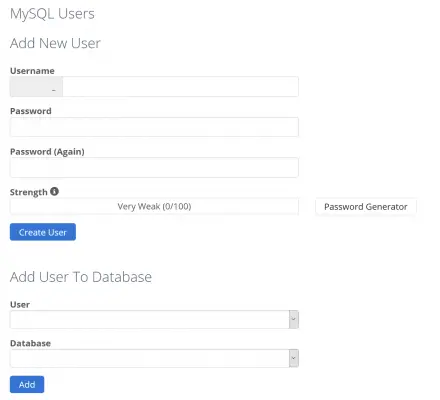
Your database user and database name will only show up once you have clicked the Create buttons. Once that has been done, in the Add User To Database section, select both the new database and new user and click Add. This is basically giving the user access to the database.
WooHoo! You have now created a brand new database and are ready to begin installing WordPress.
Installing WordPress On Your Own Host
Installing WordPress on your own host requires you to download the WordPress files. You can find them on the WordPress.org site. Once you've installed the files for the first time, you don't need to redownload the files for updates as WordPress has a handy tool to update your site to the latest version in their WP Admin.
Once you've downloaded the files, extract the files and have them ready.
Now you need to connect to your FTP site and navigate to the area where you want to install WordPress. If you want it in the root of your site, choose the public_html folder.
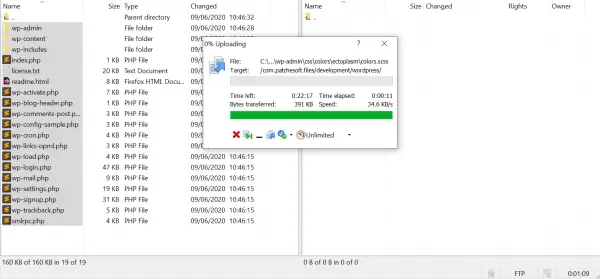
In the above example, I am using the WinSCP FTP client to upload the WordPress files to a new folder i've created called wordpress. There are quite a lot of WordPress files, so grab a cup of coffee whilst your upload completes.
Once the upload has completed, you're ready to start WordPress's installation. In your browser, head to the location you installed WordPress at. If the root, you just enter your domain name. You should see the WordPress installation screen:
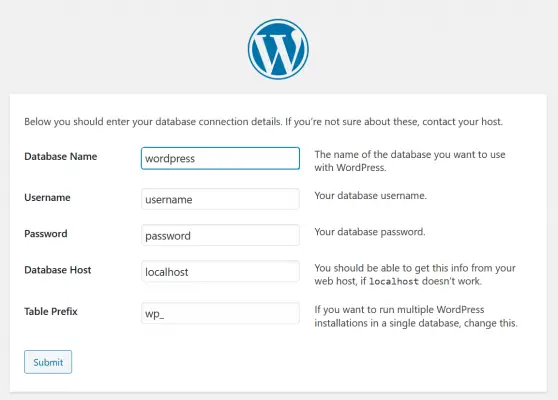
Follow the instructions to install WordPress. You'll need the database name, username and password that we created from before.
When you finish the installation, you'll be asked to name your site and create a username. Remember, we are going to be importing your old WordPress site, so this information doesn't really matter. Just make sure you remember the login information.
Once installed, login and you should be in a familiar setup: The WordPress Admin Panel. Woohoo!
Importing Your Backup To Your New Site
Once inside your newly made WordPress site, you'll want to import all the data you exported from your old WordPress.com blog.
When you export your data from a WordPress.com site, you should get a ZIP file containing an .XML file, which contains all your WordPress post data. Have that ready.
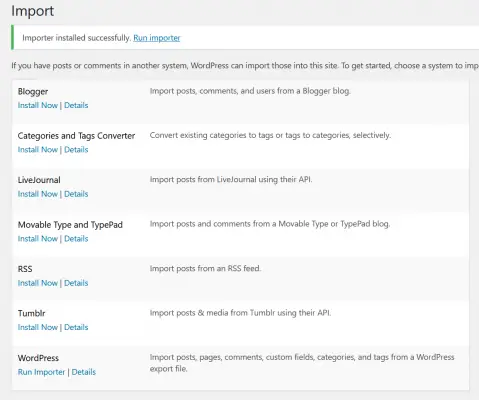
In your new WordPress self-hosted site, in the WP Admin, click on Tools and the Import option.
You'll need to install the WordPress Importer on this page in order to be able to import (ignore the other options since we are importing WordPress data only). The importer will require your FTP information to download it. Once downloaded, you'll see the option to "Run Importer". Click that link and then you'll be asked to provide your .xml file from your old blog.
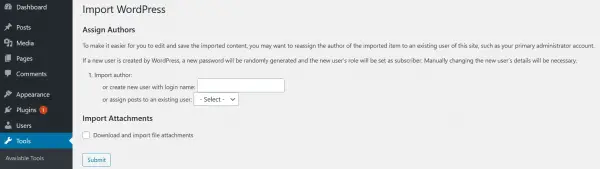
You also have the option to create a new user and assign that to posts. If you want your default setup, just ignore this option.
Congratulations, you have successfully imported your WordPress content!
Import Media Export
The final step is import the media export which contains all your images and other post content. You'll need to do this via FTP as media exports are too large to do via the Tools Import option.
To do so, you need to locate your WordPress content folder in your FTP client. This is named: wp-content/uploads/
Your export file should be a tar file that needs to be extracted. Once done, you should see a number of folders with numbers. These refer to the year your posts were created, so I have a folder named 2020. All you need to do now is drag the 2020 folder to the wp-content/uploads folder and upload it. This will then upload all your old images and other media you have added to your wordpress posts.
Congratulations you have fully moved from WordPress.com to your own self-hosted WordPress site. You will notice more options available to you in the WP Admin panel. You can also modify the WordPress files directly, including the themes folder to make site design changes.
Other Issues
Turning Off Your Old Blog
Now you need to remove your old blog once imported to your self-hosted version.
To do so, head to your WordPress.org dashboard and select the Manage Icon. Then head to settings in the navigation menu and find the option to Delete Your Site at the bottom of the page.
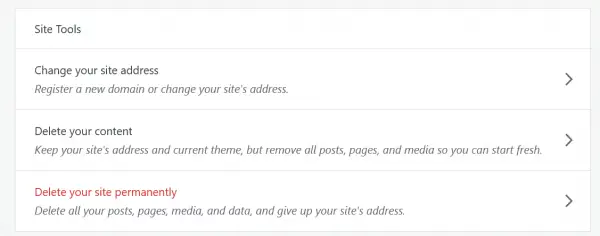
Click on it and you'll be asked to confirm your deletion.


Leave A Comment