Learn Linux: How to Install and configure ftp with proftpd
This linux tutorial will teach you how to setup proftpd on debian and configure it correctly. Setting up FTP on your server is one of the most common practises you can do; it allows you to manage your files on your server through an FTP client like Filezilla or FireFTP. Today we are going to be looking at Proftpd, a very common FTP server for Linux. This guide will teach you how to install, configure and use your new FTP system.
Don't forget to check out our cheatsheet for proftpd if you just need a list of SSH commands.
Note: Remember, if the account you're logged into isn't root, you'll need to use the sudo command before any other command to give your root access privileges. So for example:
sudo apt-get install proftpd
Installing Proftpd
Since Proftpd is a daemon that will be installed on our Linux server, we first need to download the package and install it.
Before installing, let's update our packages to the latest versions so that we can get the most up to date version of proftpd.
apt-get update
Now let's install proftpd:
apt-get install proftpd
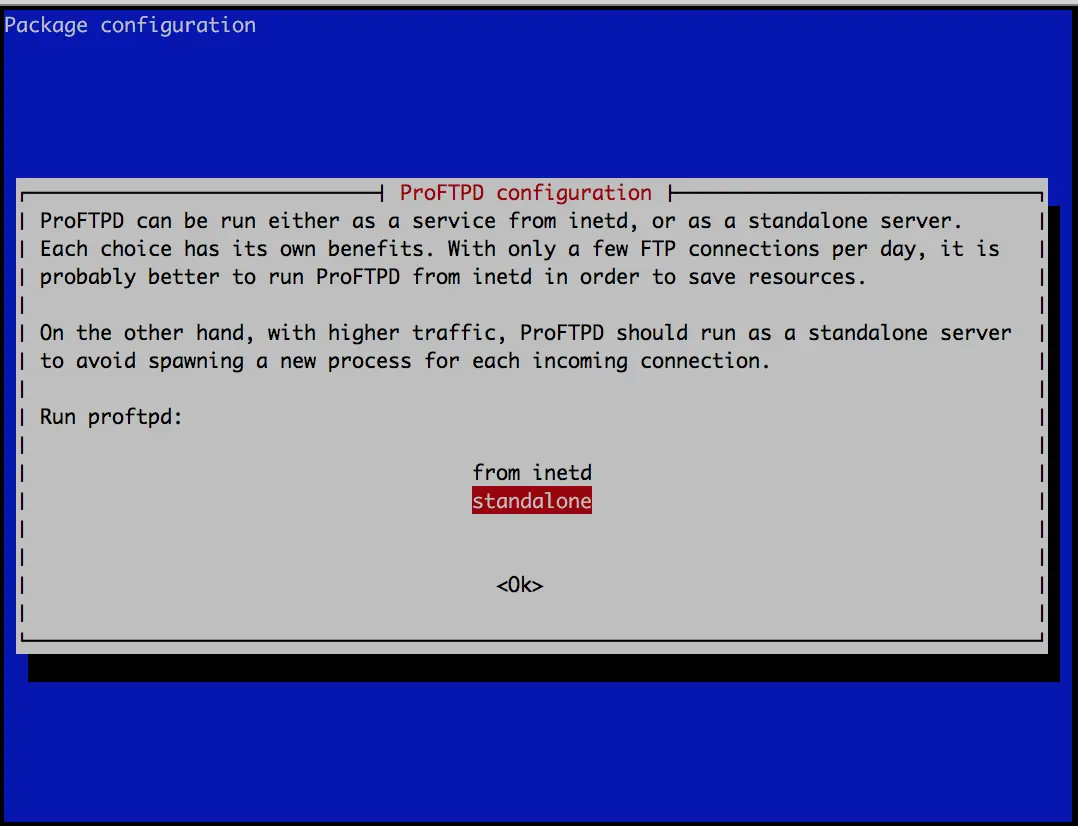
During the installation process, you'll be asked whether to install the software as a standalone or from inetd. For this installation we are going to use standalone. Hit enter and the installation should complete.
You can check that proftpd was successfully installed on your system by entering:
proftpd -v
ProFTPD Version 1.3.5
Which should show you the current version of proftpd now installed on your system. Congratulations!
Now that proftpd is installed, you can actually use an FTP client and login to your server using FTP. Proftpd uses user accounts on the Linux system to login and the ftp host address is your web server's IP/domain.
Common Proftpd Commands
Let's go over some common proftpd commands before we get started on configuring.
To stop the proftpd service, which would prevent any user from using FTP on your server, we can use this command:
service proftpd stop
To start the service:
service proftpd start
And to restart:
service proftpd restart
Protip: Whenever we make a change to the config of proftpd, it's a good idea to restart proftpd so that the changes can take place.
Configuring Proftpd
All of proftpd configuration settings are located in:
/etc/proftpd/proftpd.conf
Let's modify this file using nano and to apply some key settings:
nano /etc/proftpd/proftpd.conf
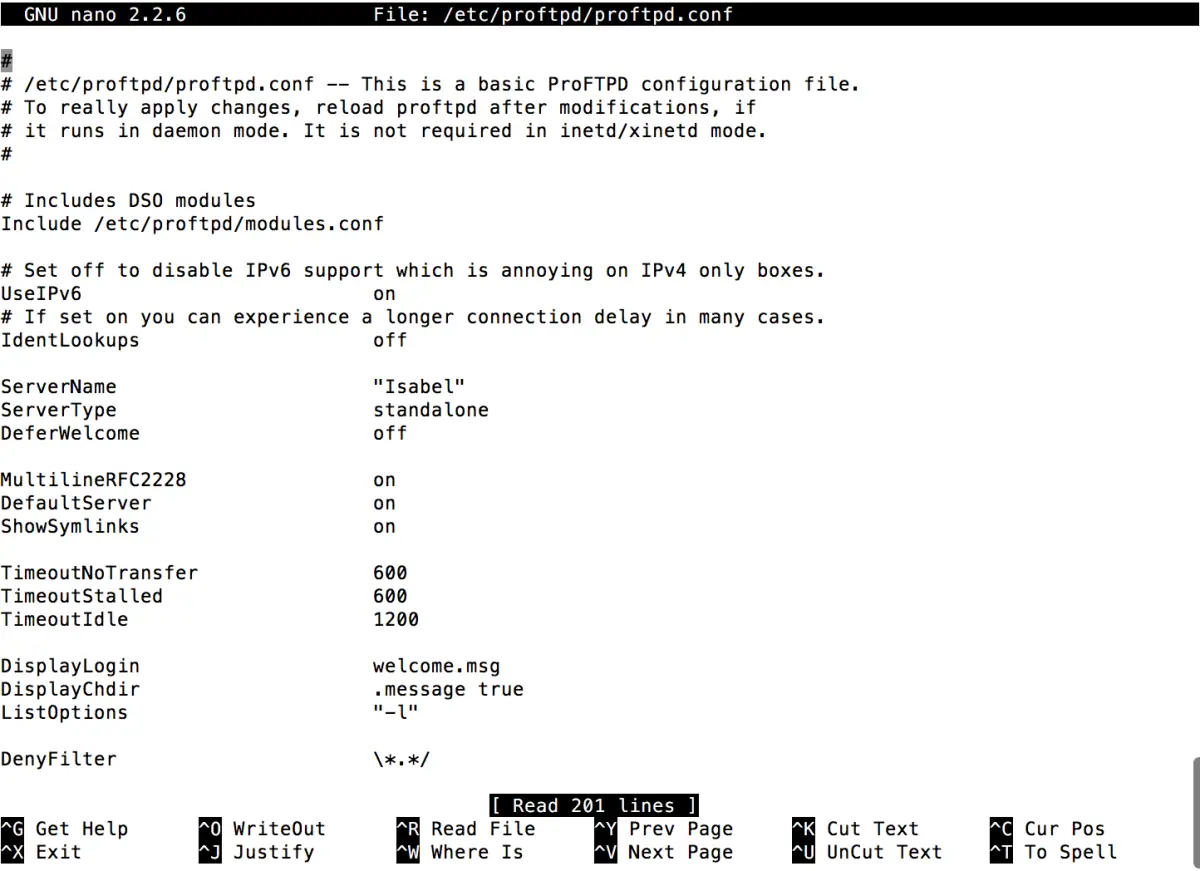
First let's change the server name to your server. You can name it whatever you like, in my screenshot above I've called it Isabel (the name of my server). Or you can simply use your domain name:
ServerName "example.com"
Make sure the DefaultRoot setting is set to ~ (this symbol means the home directory of the user). You may need to uncomment the line (remove the # next to the line).
DefaultRoot ~
This setting basically forces a user to stay within their home directory (chroot). When you create a user using adduser, you can specify their home directory. If you leave this option commented, the user will be able to access the whole file system from FTP, rather than just files from within their home directory. Check out our User Management guide for Linux if you need a refresh on how to add new users.
That's pretty much for all the settings we need to change for our proftpd config. Save the file (ctrl+o) and exit (ctrl+x). Now let's restart proftpd so that our configuration changes apply:
service proftpd restart
Setting up Multiple Users + Permissions
One common task is allowing multiple users to have access to the same directory. Let's say we have a directory on our system that we use for web development:
/home/public_html/
And we have two users:
ftpuser
newftp
We now introduce a term called chroot. This term basically means that the users are jailed to a specific directory and cannot access any other folder or file outside of their jailed folder. This is useful to us because what we want to do is make our ftp users only have access to our new directory: /home/public_html. Currently, they are jailed to their default home directories.
So first let's create a new user group for our FTP users:
addgroup web-devs
Let's add our FTP users to this new group:
usermod -a -G web-devs ftpuser
usermod -a -G web-devs newftp
The usermod command allows us to add our FTP users to our newly created group web-devs. To make sure the user was added to the group, we can check using the id command:
id -G -n ftpuser
id -G -n newftp
You should see something similar to this:
ftpuser web-devs
newftp web-devs
This shows that the user is part of two groups: their default created group and the newly added web-devs group. Next we need to update the proftpd config file to add in the directory we want are FTP users to be chroot'ed to.
nano /etc/proftpd/proftpd.conf
Find this line:
DefaultRoot ~
Now above this line, add
DefaultRoot /home/public_html web-devs
This configuration is basically saying to chroot the users in the group web-devs to the directory of /home/public_html. Make sure this line is ABOVE the default, as proftpd will apply the first rule and then the second rule for all directives of DefaultRoot.
Save the file and exit (ctrl+o and ctrl+x).
Protip: A directive is basically a setting of the software that we can modify, normally in the software's config files. Restart proftpd again to apply the changes:
service proftpd restart
Next, if you haven't already done so, we want to create our home directory:
mkdir /home/public_html
Now when you login to FTP with either newftp or ftpuser, you should be inside the /home/public_html directory. Only users inside the web-devs group will be able to access this folder from FTP.
One final act to consider is permissions. In order to be able to write/edit files to the FTP folder, we need to make sure the folder has the correct permissions. When you create the /home/public_html directory, it is assigned the user and group permissions of the user creating it.
Since files and folders can only have one group, we need to change /home/public_html group owner to web-devs group so that our ftp users can read and write files to it.
We can do that by using this command:
chgrp web-devs /home/public_html
Finally, make sure the folder also has write permissions by using chmod on the folder:
chmod 775 /home/public_html
In chmod, 7 means the folder has read+write+execute permissions. Each digit is assigned to: file owner, group owner, other users. So we have specified that the owner of the file and any user in the group have read, write and execute. Any other user would just have read and execute permissions. Since our ftp users in the web-devs group now have read+write+execute permissions, they can all upload/edit files in the /home/public_html folder. For more information on chmod, check out this great wikipedia article.
Finally, to make sure you've applied the right settings, we can check the folder's permissions using the ls command:
ls -l

This shows the chmod permissions on the left, the user owner and the group owner of the folder.[/caption] Congratulations! Hopefully this guide is helpful to you in setting up your proftpd server. If you get stuck or have any questions, feel free to post a comment and I'll try to help as best I can.


UNAL
Dear,
Thanks for your post! It is what I am looking for... A directory for each group. I have followed your instruction and completed. However, the default group of uploaded files is the same as the user. Why it behaves like that, do you know?
Thanks.
Reply